DECEMBER 22, 2016
TAGS
Hie,
We had Microsoft code.fun.do Hackathon in our third semester and I, along with my two friends Salman and Aiman, created a Location and Augmented Reality based app, which won us the Hackathon. Interestingly, I won the hackathon for second time :D, the first was in the first year.
Implementing the Augmented Reality was the toughest part, had to search a lot and apply some of my own techniques to implement it. So, I’m writing this tutorial for the ones who want to implement Augmented Reality in an Android app as well as for my own future reference.
Since, the whole tutorial is kinda big, I divided it in two parts, viz. Theory and Implementation. This part will deal with the underlying principles and the next one will deal with the actual code.
The Theory covers following topics:
What is Augmented Reality?
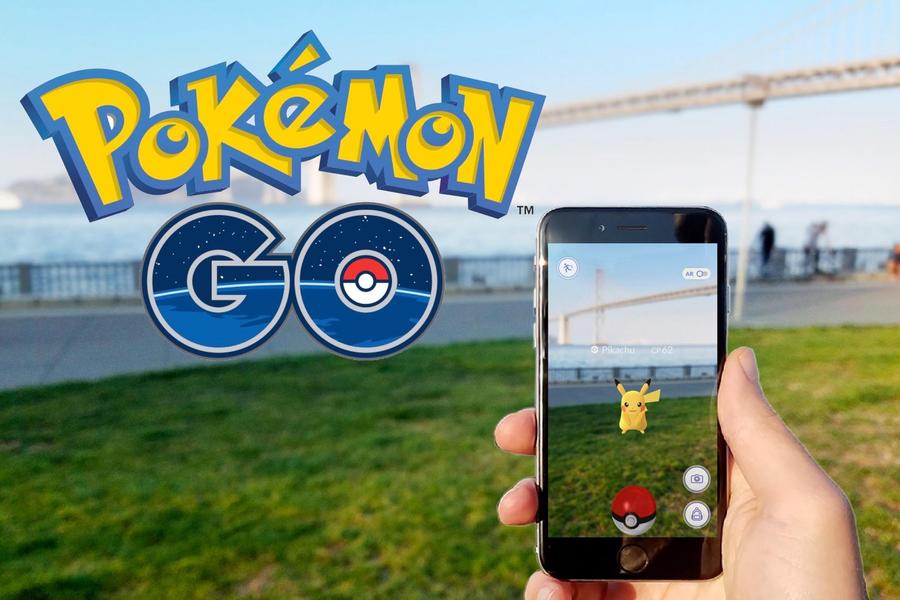
Augmented Reality (AR) is a technology that superimposes a computer-generated image on a user’s view of the real world. Don’t confuse Augmented Reality with Virtual Reality (VR), the two are different. Virtual Reality is completely virtual whereas Augmented Reality is virtual items imposed in real world. A good example of Augmented Reality could be the Pokemon Go Game.
What to expect from the Tutorial?
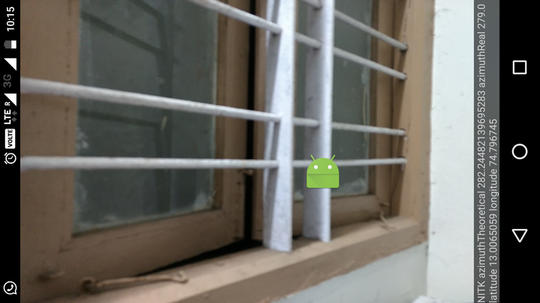
At the end of the Tutorial you would be able to implement an Augmented Reality based Android app. The end result will look something like this:
The Math
Let’s do the Math. I know this could be a little boring, but believe me, understanding this will help you in easy time while implementation of not only this app but any Augmented Reality app. You may even understand the logic behind the Pokemon Go app if you relate this to it.
So, in the app, we need to show a point whenever the divice camera points to it. Let’s see this with bird’s eye view. We have two points on plane, the device and the point to show(let’s call it Point of Interest or POI).
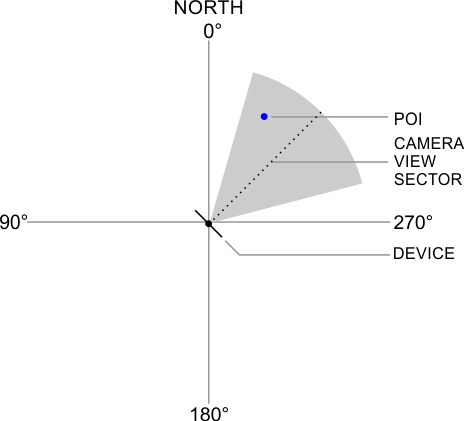
Now, we need to make some relation between these two points. So, we introduce a third point. So, where is this third point? - Where the Starks Rule - The NORTH (Coz, The North Remembers ;p).
Let’s keep the device location at origin and the North at 0°. Let’s call the angle made by the POI at device location as Azitmuth angle(φ). Wait, what’s Azimuth angle?
The Azimuth is the angle formed between a reference direction (North) and a line from the observer to a point of interest
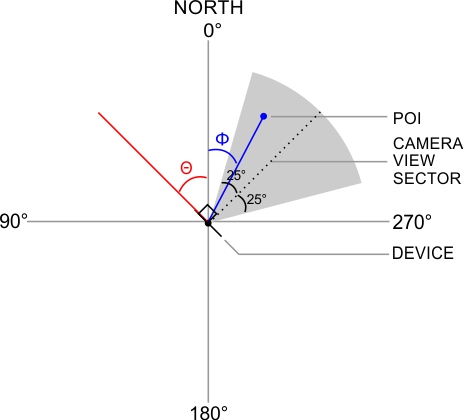
But how are we goind to calculate azimuth? The answer is simple trigonometry. Let dx be the difference in x-coordinates of the device and POI and let dy be the difference in y-coordinate. Then

tan(φ) = dx/dy
φ = tan-1(dx/dy)
The device itself will form some angle with the North. Let the angle formed by the plane of device and the North be the Device angle(θ). But the device Camera shows a range(sector) of plane. Generally the sector covered by the Camera is 50° to 60°. Let’s assume it to be 50°. So, the sector covered by Camera in our plane will be 25° either side of the Device angle(θ) i.e. θ ± 25.
But there’s something missing. The view of Camera is perpendicular to the plane of device. So, we need to add 90° to θ to get actual sector. So the sector now becomes (θ+90) ± 25.
Now, all we need to do is to check if the POI lies in the sector created by Camera’s view. To do this we check if the Azimuth angle(φ) lies between the range of sector i.e. (θ+90) ± 25.
That’s all. We got to know how we are gonna proceed. The next part is Implementation. Stay tuned for the next part of the Tutorial.
In case you are looking for career in AR and want a primer on it, you should definitely checkout this Hiring Guide by Toptal